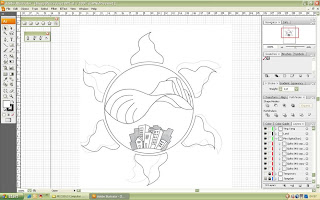
From hand drawing to illustrator in computer, I scan the sketch that I drew into digital form. In Adobe Illustrator, I import the file and use it as a template for my tracing of the line. After that, I show Ruler and grid before I start my work.
 Then, I create a new layer with the name of Ying Yang. I start drawing with a Ellipse Tool by pressing the Shift and Alt button from the centre the circle of my sketch. After that, I trace a straight line with pen tool. With the straight line, I used free Convert Anchor Point tool to make a curve line.
 At this process I create a another new layer with the name of wave. I also start tracing the line with pen tool and also used the Convert Anchor Point tool to make all the curve line.
 With the wave done. I move on to another new layer. That is the Iceberg. With the same matter I trace the line with pen tool and transform the line to curve line to create the iceberg.
 Since the above part done, I also have to create new layer with the name city. With the same method I trace the line with the pen tool and make curve line for the land that support the city.

To create the spike, I start off by creating a new layer with the name of temporary. In that layer I draw another circle with the help f ellipse tool. With the same matter by pressing the shift and alt, I create the circle from the middle but the circle a lightly bigger than before. After that I create another layer call spike. On this layer, I trace the spike of my sketch with a pen tool and make curve line with free Convert Anchor Point tool. With the first spike done, I drap the layer of the spike to create a new layer for 5 times. Then, with that i get 5 same spike. I rotate each 60, 120, 180, 240, and 300 and match it to the circle that I create before.
 Then, I create a new layer with the name of Ying Yang. I start drawing with a Ellipse Tool by pressing the Shift and Alt button from the centre the circle of my sketch. After that, I trace a straight line with pen tool. With the straight line, I used free Convert Anchor Point tool to make a curve line.
 At this process I create a another new layer with the name of wave. I also start tracing the line with pen tool and also used the Convert Anchor Point tool to make all the curve line.
 With the wave done. I move on to another new layer. That is the Iceberg. With the same matter I trace the line with pen tool and transform the line to curve line to create the iceberg.
 Since the above part done, I also have to create new layer with the name city. With the same method I trace the line with the pen tool and make curve line for the land that support the city.
To create the spike, I start off by creating a new layer with the name of temporary. In that layer I draw another circle with the help f ellipse tool. With the same matter by pressing the shift and alt, I create the circle from the middle but the circle a lightly bigger than before. After that I create another layer call spike. On this layer, I trace the spike of my sketch with a pen tool and make curve line with free Convert Anchor Point tool. With the first spike done, I drap the layer of the spike to create a new layer for 5 times. Then, with that i get 5 same spike. I rotate each 60, 120, 180, 240, and 300 and match it to the circle that I create before.
With all the tracing done, I group each of the layer one by one and fill in the colour with Live Paint Bucket Tool. Each color is pick from colour swatch and rename to which layer that I apply.


No comments:
Post a Comment